

Juicing fresh fruits and vegetables can offer tremendous health benefits and boost your energy levels. Plus you’ll find that that you and your family will just love the taste of fresh juice any time of the day. When you start juicing it’s important that you properly clean and maintain your juicer. If you leave pieces of food in the container or let pulp build up in the crevices of your machine, bacteria, mold, and germs can start to grow. The last thing you want to do is drink contaminated juice from a dirty juicer. This article provides you with some helpful tips on keeping your juicer clean and germ-free so that it will keep churning out delicious, fresh juice for you and your family.

There are three major types of juicers on the market and they vary slightly on how much cleaning and maintenance is needed. Citrus juicers that are primarily for citrus fruits like oranges and grapefruits are fairly easy to clean. Most parts are dishwasher safe and the whole appliance is easy to disassemble.
Juice extractors, which can be used on a variety of different fruits and vegetables, are a bit more complicated to clean but still relatively straightforward. Most removable parts are dishwasher safe. You need to take some care though when cleaning the shedder or grater component as it contains sharp cutting blades.
Wheatgrass juicers, which consist of masticating single gear machines and triturating twin gear machines, are the most efficient and versatile of the three types of juices. The interlocking gears on these machines can be a little more difficult to disassemble for cleaning though. However, once you get everything laid out, all the parts are easy to clean and most are dishwasher safe.
Your owner’s manual can provide detailed information that is specific to your appliance. Also make sure that you check the manual before adding any parts to your dishwasher. Some parts are dishwasher safe, and others are not, and this can vary from model to model.
The following lists the basic steps you need to take to clean a standard juicer, along with a few tips to help make things easier for you.
How to Clean and maintain your juicer
Step 1 – Turn of the Power
Make sure that your juicer is turned off. Then remove the plug from the power outlet before you start taking apart and cleaning your juicer. Also, make sure everything is unplugged when you reassemble your unit and store it away for next time.
Step 2 – Disassemble the Appliance
Start by removing the pulp container from your juicer and clean out all of the pulp. You can reuse the pulp in a recipe, use it as compost in your flower garden, or just throw it away. After you remove the pulp container, check down around where the container was and see if there is any pulp left. You can use a spoon to scoop this out. When you take the filter basket out of the juicer, make sure you hold it on the sides so that you won’t cut yourself on the sharp blades that are on the bottom.
Step 2 – Rinse-Off All the Parts
Rinse all removable parts that are in contact with food, under a water facet using hot soapy water. This should remove most of the pulp that’s in the appliance. You can also fill your sink with soapy hot water and let all the parts soak for a while. When you take the parts out from soaking just let them air dry.
Step 3 – Add Parts to the Dishwasher
Add all of the dishwasher safe removable parts into your dishwasher. If you consistently wash the parts with warm soapy water and soak them, you probably don’t need to load them into the dishwasher every day. Every other day or when you feel like they are starting to get dirty would probably work best. Be sure to check your manual to see which parts are safe and which parts should only be placed on the top rack. If you find that the dishwasher is not cleaning hard to reach parts very well, you can try using a small pipe cleaning brush to get the job done.
Step 4 – Clean the Motor Base
Wipe down the motor base with a clean, damp cloth or paper towel to clean off any juice or pulp that may have dripped down onto it. Be sure to wipe thoroughly around the top of the motor base where the locking mechanism is located. This will help to ensure that this area does not become sticky and locked up in any way. Don’t immerse the motor base in water or any other liquid and do not use a strong stream of water to clean the motor base. There are electric parts in the base that are sensitive to hard jets of water.
Step 5 – Wash the Filter Basket
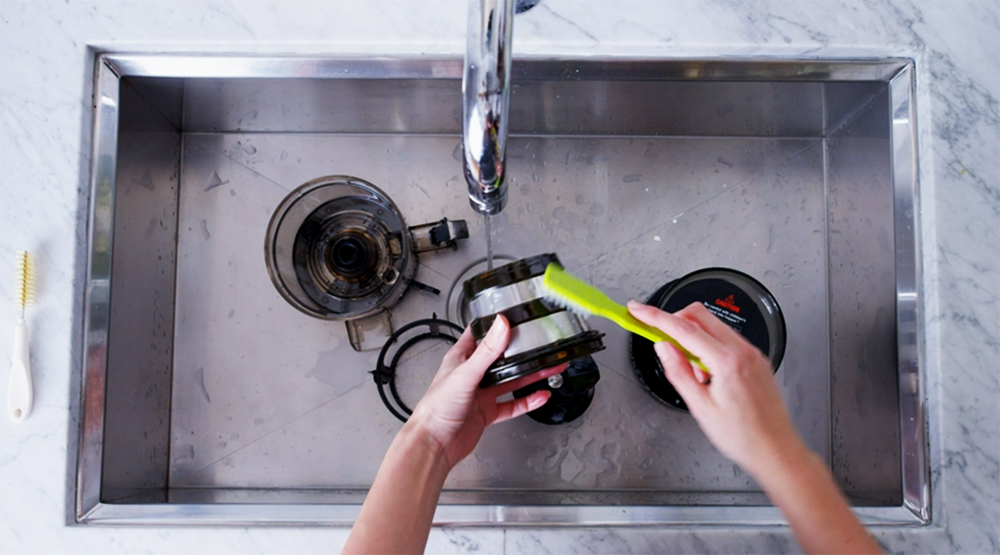
Many machines will come with a nylon washing brush to help you clean certain parts. This is especially useful for cleaning the filter baskets that come with many machines. The filter basket and feed chute contain a sharp blade and small sharp teeth that are designed to process and cut foods when the machine is juicing. These are sharp enough to cut you if you’re not careful. The nylon washing brush can be used to clean the filter basket without the risk of getting cut.
Step 6 – Soak in Lemon Juice to Remove Tough Food and Stains
If you find that any of the holes in the filter basket are blocked or there is debris that can’t be removed easily by hand from other parts then you can try soaking them in hot water with 10% lemon juice to help loosen the blocked holes. Also fruits and vegetables with strong colors can sometimes cause discoloration of plastic parts on your juicer if you don’t wash the parts immediately after you use them. If you find that any plastic parts on your machine are starting to become discolored, you can try the lemon juice soaking method as well.
Step 7 – Reassemble the Unit
After all the parts are dry you can put your juicer back together. After reassembly, it can be stored in a clean dry area until the next time you’re ready for some fresh juice.
Helpful Hint
It’s a good idea to place a freezer bag or small trash bag into the pulp container to collect the pulp. This will help with washing and cleaning because you can just have to remove the bag containing all the pulp and not have to clean the actual container.